
Furniture making and repair are rewarding DIY projects that can add charm, functionality, and personal touch to your living space. One of the most crucial elements in successful woodworking is the use of the right adhesive — and Wood Bond adhesives have become a popular choice among professionals and hobbyists alike for their strength, versatility, and ease of use. Whether you are building new furniture pieces from scratch or restoring an old chair or table, understanding how to properly use Wood Bond adhesives can dramatically improve the quality and durability of your work.
In this comprehensive guide, we will walk you through each step of using Wood Bond adhesives for furniture projects, covering preparation, application techniques, curing times, and best practices. We’ll also share tips on common mistakes to avoid and how to achieve professional-grade results with the right tools and methods. By the end of this article, you will be confident in applying Wood Bond adhesive to create sturdy, long-lasting furniture pieces that stand the test of time.
Understanding Wood Bond Adhesives and Why They Are Ideal for Furniture Projects
Wood Bond adhesives are specially formulated glues designed to provide a strong, durable bond between wood surfaces. Unlike general-purpose glues, Wood Bond products often contain ingredients that penetrate wood fibers, creating a bond that is sometimes stronger than the wood itself. These adhesives are typically water-resistant or waterproof, allowing furniture to endure varying environmental conditions, including humidity and occasional spills. This makes them ideal for both indoor and outdoor furniture applications.
Choosing the right Wood Bond product is the first step toward a successful project. Different adhesives vary in drying time, viscosity, and bonding strength. Some are better suited for hardwoods, while others excel with softwoods or engineered woods like plywood and MDF. Understanding these differences helps you select an adhesive that matches the specific demands of your furniture project, ensuring optimal results.
Step 1: Preparing Your Workspace and Materials for Optimal Adhesion
Before applying Wood Bond adhesive, preparation is key to achieving a reliable bond. Start by cleaning your workspace and ensuring it is well-ventilated. Remove any dust, dirt, or grease from the wood surfaces to be bonded, as contaminants can interfere with adhesion. Use a clean cloth and, if necessary, a mild solvent like denatured alcohol to wipe down the surfaces.
Next, ensure that the wood pieces fit together properly. Test the fit by assembling the pieces without glue, checking for gaps or misalignment. Wood Bond adhesives perform best on tight-fitting joints where surfaces are flush against each other. Sand any rough edges lightly to create a smooth contact area, but avoid over-sanding which can reduce the glue’s grip.
Gather all necessary tools, including clamps, brushes or applicators, and protective gloves. Having everything ready beforehand prevents rushing during application, which can compromise glue performance.
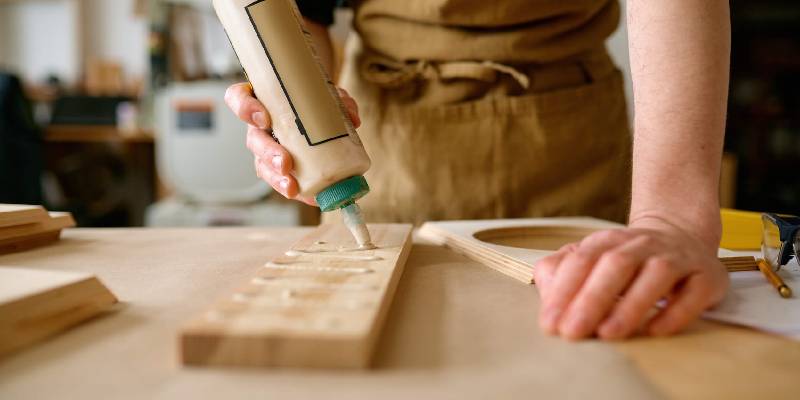
Step 2: Applying Wood Bond Adhesive Correctly for Maximum Strength
Proper application technique plays a major role in the strength and longevity of your furniture joints. Use a brush or a glue spreader to apply an even coat of Wood Bond adhesive on one or both surfaces, depending on the type of adhesive and project requirements. Avoid applying too much glue, as excessive adhesive can squeeze out and create a mess, while too little may result in weak bonding.
Pay close attention to manufacturer instructions regarding open time — the period between applying the glue and joining the surfaces. Open time varies depending on the product and ambient conditions like temperature and humidity. Joining pieces within this window allows the adhesive to penetrate wood fibers and form a durable bond.
After applying the adhesive, press the wood pieces together firmly to ensure full contact. Use clamps to hold the joint securely in place throughout the curing period. Clamping pressure should be enough to close the joint tightly but not so strong that it squeezes all the glue out. Proper clamping also helps prevent shifting or misalignment during drying.
Step 3: Understanding Clamping Techniques and Timing for Effective Bonding
Clamping is one of the most critical steps in woodworking adhesive application. Without adequate pressure, joints can be weak and prone to failure. Depending on the furniture piece and joint type, different clamps may be used, including bar clamps, C-clamps, or corner clamps.
Position clamps evenly around the joint to distribute pressure uniformly. Avoid placing clamps directly over the glue line, as this can cause uneven pressure. Use scrap wood pieces as cauls between the clamp jaws and your furniture to prevent damage or indentations on delicate surfaces.
The duration of clamping depends on the adhesive type and environmental conditions. Many Wood Bond adhesives require clamping for at least 30 minutes to an hour, but full curing may take 24 hours or longer. It’s important to follow product-specific guidelines to avoid disturbing the joint before it has gained sufficient strength.
Step 4: Removing Excess Glue and Cleaning Up for a Professional Finish
Once your furniture joint is clamped, it’s essential to clean up any glue squeeze-out immediately. Fresh glue can be wiped away with a damp cloth or sponge before it dries, preventing unsightly residue that can affect the appearance of your finished piece.
If glue has dried on the surface, carefully scrape it off with a sharp chisel or sanding block, taking care not to damage the wood. Removing excess glue promptly not only improves aesthetics but also helps subsequent finishing steps like staining or painting adhere evenly.
Additionally, clean your tools and applicators with warm soapy water if you are using water-based Wood Bond adhesives. Proper tool maintenance ensures they remain effective for future projects.
Step 5: Allowing Adequate Curing Time to Achieve Maximum Bond Strength
Patience during the curing process is crucial for ensuring the longevity of your furniture projects. While initial bonding may seem strong after clamping, full adhesive curing can take from 24 hours up to several days, depending on the Wood Bond product and environmental factors.
Avoid moving, stressing, or sanding the joint prematurely. Disturbing the bond before it has fully cured may weaken the joint or cause failure over time. To facilitate curing, keep your workspace at a stable temperature and humidity level as recommended by the adhesive manufacturer.
If you plan to apply finishes such as paint, varnish, or stain, wait until the adhesive is completely cured to avoid interference with the finishing process and ensure a smooth, even appearance.
Step 6: Finishing Your Furniture Project for Durability and Aesthetic Appeal
After the adhesive has fully cured, you can proceed with the finishing touches that bring your furniture piece to life. Sand the joints lightly to smooth any rough spots or residual glue, then clean the surface before applying your preferred finish.
Wood Bond adhesives are designed to be compatible with most finishes, but testing on a scrap piece is recommended to ensure no adverse reactions occur. Whether you choose to stain, paint, or varnish your furniture, a well-bonded joint will provide a sturdy base that supports the finish and enhances the overall look.
Finally, inspect the finished product for any weak points or imperfections and address them promptly. Proper finishing not only improves durability but also elevates the craftsmanship of your project.
Common Challenges and Troubleshooting Tips When Using Wood Bond Adhesives
Even with careful preparation and application, woodworking projects sometimes face challenges. Common issues include glue joints failing, excessive glue squeeze-out, or prolonged drying times. Understanding the causes can help you troubleshoot effectively.
Weak bonds often result from insufficient clamping pressure, dirty surfaces, or using the wrong adhesive type for your wood. Ensure surfaces are clean and dry, joints fit tightly, and clamps apply uniform pressure. If the glue is drying too slowly, check the temperature and humidity in your workspace and adjust accordingly.
For excess glue squeeze-out, apply thinner layers and wipe away residue promptly. If you encounter curing problems, verify you are following the manufacturer’s recommended curing times and conditions. Using high-quality Wood Bond adhesives from trusted manufacturers like Sabi Chemicals can also minimize these issues.
Advanced Tips for Professional-Quality Wood Bond Adhesive Application
For seasoned woodworkers or those aiming for the highest quality finish, consider these advanced tips. Use a roller or fine brush for uniform adhesive spread, especially on large surfaces. Pre-clamp your pieces lightly to check fit before applying glue. When working with porous woods, consider applying a thin primer coat of glue to one surface to improve adhesion.
Temperature and humidity control in your workspace can significantly affect drying and curing times. Maintain consistent conditions to avoid premature drying or delayed curing. Additionally, invest in quality clamps with adjustable pressure settings to fine-tune the clamping force.
Regularly attend workshops or watch tutorials to stay updated on the latest adhesive technologies and application methods. Continuous learning helps refine your skills and achieve superior furniture-making results.
Conclusion: Mastering Wood Bond Adhesives to Elevate Your Furniture Projects
Mastering the use of Wood Bond adhesives is essential for any DIY enthusiast or professional woodworker aiming to produce durable, beautiful furniture. By following the detailed steps outlined in this guide—from surface preparation to finishing touches—you ensure strong, lasting bonds that enhance the strength and longevity of your projects.
Proper selection of adhesive, meticulous application, controlled clamping, and patience during curing are all critical components of success. Embracing best practices and avoiding common pitfalls will enable you to achieve professional results and take pride in every piece you create.
As you gain experience with Wood Bond adhesives, you’ll discover that these versatile products open up new possibilities in furniture design and repair, making your woodworking journey more enjoyable and rewarding. With the right knowledge and techniques, your furniture projects will stand as testaments to craftsmanship and quality for years to come.